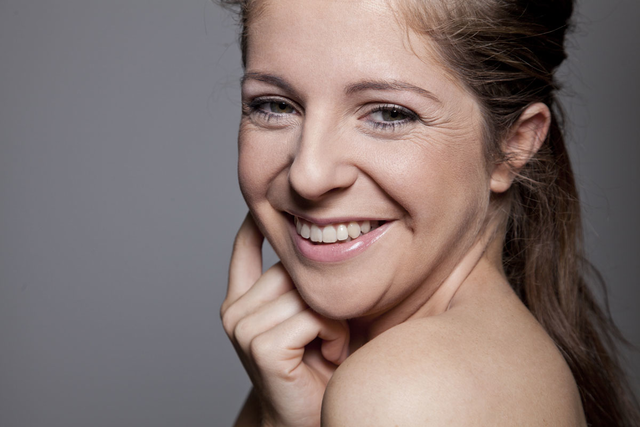
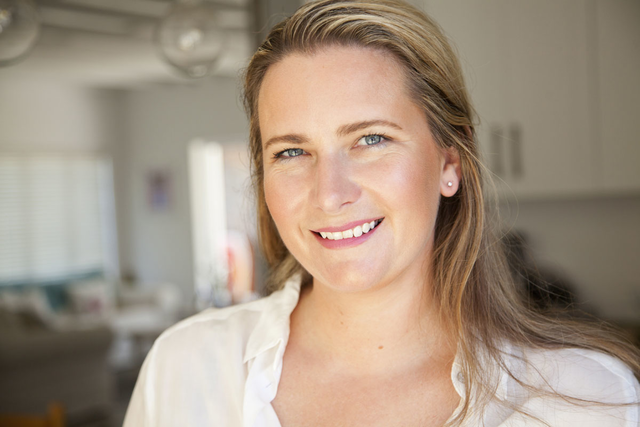
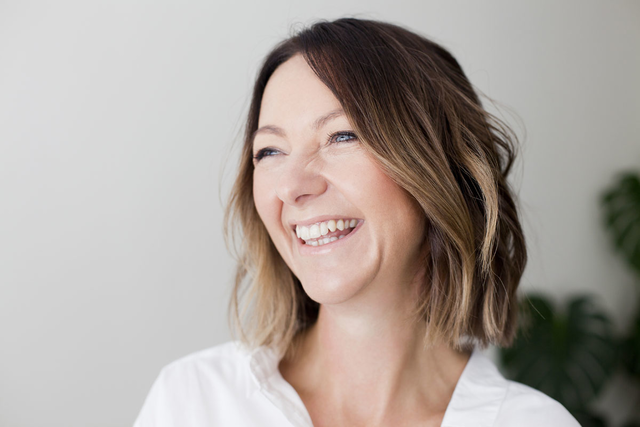
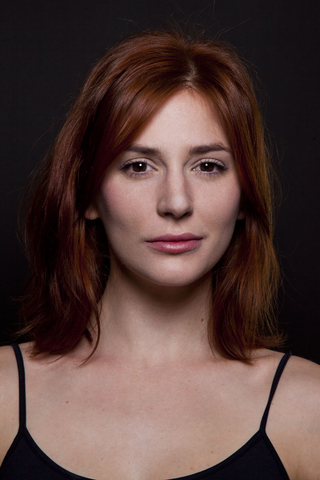
Marike Herselman Photography knows a thing or two about portrait photography. Not everyone can afford a makeup artist for their photo shoot, and so if you’re not planning on getting your make-up done professionally, here are a couple of factors to consider when standing in front of the mirror before your portrait shoot.

PREP WORK FOR YOUR PORTRAIT PHOTOGRAPHY SESSION
While not make-up related, doing the following 3 activities will ensure that “your canvas” i.e. your face, will need less make-up on the day of the portrait photography shoot – and less is always more.
1. HYDRATE HYDRATE HYDRATE
Make sure you drink lots of water the week before as this flushes all the toxins out, helps your skin look smoother and you will be less prone to blemishes. It is recommended though to do this a week before and leading up to the shoot because you may find you will pop out a bit with pimples and spots. Give your skin time to adjust to the onslaught of lots more water than you’re used to.
2. THE FOOD YOU EAT
Avoid greasy foods as they don’t transition well onto the face. You want to avoid looking pasty or shiny, which is what foods high in fat can do to your skin.
3. YOUR CLEANSE ROUTINE
If you are not normally vigilant with your cleaning routine, then make sure you do a week leading up to the shoot – pretty much for the same reasons as drinking water and avoiding fatty foods.
YOUR MAKEUP APPLICATION
You apply your own makeup on a daily basis and probably follow the same routine, in a comfort zone, but for a shoot, you should be focusing on a few salient areas.
1. APPLY YOUR MOISTURISER BUT FOREGO THE SPF
The ingredients in an SPF moisturiser can make a white flashback in the photos, making you look quite pale and washed up.
2. MAKE SURE YOUR FOUNDATION MATCHES YOUR SKIN TONE
While you may think your foundation is a match, moving from winter to summer can change your skin colour, so do a quick check before applying for your shoot. Flash photography will bring out those differences very clearly, especially between your neck and face area, so make sure it’s blended in nicely.
3. CONCEALER IS KEY
Be sure to apply some concealer under your eyes as flash photography can highlight those dark rings. Again, make sure the concealer matches your skin tone around the dark area and apply it from deep in the corner of your eye to a flare out across the dark patch – blend in well.
4. CONTOUR FOR A NATURAL LOOK
We don’t expect you to be an artist, but contouring is essential to highlighting the natural shape of your face. Simply use contouring colours – or your blemish stick – start between the eyebrows, down those grooves alongside your nose and mouth, and lastly those crows lines at the outer corners of your eyes. Blend in.
5. BLUSH UP
Hand in hand with contouring, use your blush powder to further highlight your natural shape. First, squeeze those lips into a pout, find the highest contour of your cheekbone, then apply some blush with upward strokes. Apply a little to your throat area and on your nose – not too much mind you.
6. OH THOSE EYES
Keep the eyeshadow super natural, starting off with a light shade as a base, then a slightly darker shade over your eyelids. You can also blend in a bit to create a nice smokey effect under the eyes.
A little bit of eyeliner, smudged in on the top of your eyelid and a little underneath. Then finish off with some dark mascara, top and bottom. If you have thin eyebrows, you can fill them in a bit with some light eyeliner, but keep to your natural shape and line.
7. LIPS
A bit of colour is always recommended. Sometimes a natural colour with a slightly darker lip liner will help to plump up your lips. Avoid very dark or bright colours otherwise, your lips will be the focal point in every photo.
To book your portrait photography shoot, make contact with Marike Herselman Photography today. (and, we can arrange a professional make-up artist if you prefer)
Connect with Home Food and Travel further on Facebook.